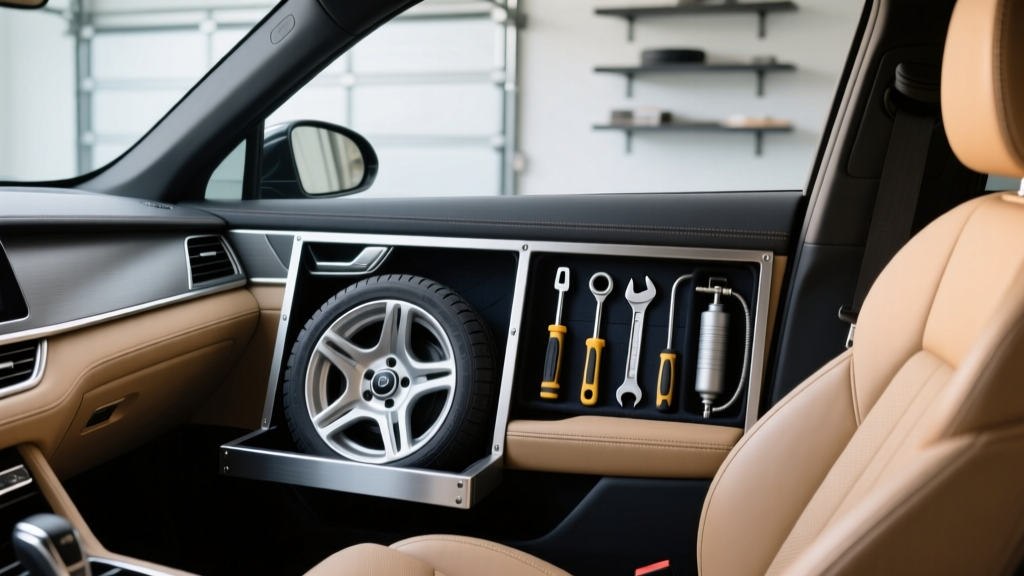
Tire Kit Organization: Customization Techniques (2026)
A flat tire (or a slow leak you discover at the worst possible moment) is stressful enough without having to dig through a messy trunk for the right tool. Most vehicles have a spare tire kit, a compact jack, a lug wrench, maybe a tow hook and wheel lock key?yet many owners leave everything loose, incomplete, or blocked by cargo. That?s how small problems turn into long roadside delays.
Organizing your tire kit is also an interior-management issue. The trunk, cargo area, and underfloor storage are part of your cabin experience: rattles, wasted space, stained carpet, and damaged trim all come from gear that isn?t secured. With a little planning, you can build a tire kit setup that?s safer, faster to access, and tailored to your vehicle and driving habits.
This guide walks through advanced tire kit organization customization techniques?practical layouts, mounting methods, labeling, and upgrades. You?ll get step-by-step instructions, product comparisons, and the common mistakes that cost people time (or a tow bill).
What Counts as a ?Tire Kit? (and What Yours Should Include)
Factory tire kits vary widely: a full-size spare in a well, a donut spare, or a tire mobility kit (sealant + compressor). Before you reorganize, confirm what your vehicle is designed to carry and what you personally need.
Core components (most vehicles)
- Spare tire (full-size or compact) or tire mobility kit
- Jack (scissor jack or bottle jack)
- Lug wrench or breaker bar + correct socket
- Tow hook (common on many European vehicles)
- Wheel lock key (if you have locking lug nuts)
- Owner?s manual quick reference (jacking points and instructions)
Advanced add-ons (highly recommended)
- Torque wrench (so lugs are tightened correctly)
- Work gloves + kneeling pad
- Headlamp (hands-free beats a flashlight)
- Wheel chocks (folding rubber or lightweight composite)
- Tire plug kit (for punctures on repairable tread areas)
- Portable air compressor with accurate gauge
- Reflective triangle or compact safety cones
- Microfiber rag and small trash bag for dirty tools
Plan Your Layout: Match Organization to Vehicle Type and Storage Design
Advanced organization starts with understanding your cargo architecture. A sedan trunk with a spare well needs a different approach than a crossover with an underfloor bin, and a pickup with a rear-seat storage compartment has its own best practices.
Common storage zones to use
- Spare tire well: ideal for heavy tools; keep center of gravity low.
- Underfloor bins: great for clean, modular pouches; protect from shifting cargo.
- Side cubbies: perfect for a compressor, gloves, and light.
- Seat-back MOLLE panel (SUVs/off-road builds): fast access and high visibility.
- Truck rear seat storage: secure, weather-protected, easy to reach.
Real-world example: the ?fast-access triangle?
Many enthusiasts use a three-tier access plan:
- Tier 1 (30 seconds): headlamp, gloves, wheel lock key, valve tool?stored in a small pouch on the side cubby.
- Tier 2 (2 minutes): lug tool and jack?stored in the spare well in a fitted case or strapped down.
- Tier 3 (5 minutes): plug kit, compressor, triangles?stored underfloor or behind a panel, neatly boxed.
Step-by-Step: Build a Customized Tire Kit Organization System
Step 1: Inventory and verify compatibility
- Lay everything out on the ground: jack, handle pieces, wrench, sockets, key, compressor/sealant.
- Confirm your lug nut size (commonly 17mm, 19mm, 21mm, 22mm?don?t guess).
- Locate and test the wheel lock key on one wheel at home (many drivers find out it?s missing on the roadside).
- Check the spare tire pressure (donuts often require ~60 PSI; verify the sidewall spec).
- Review jacking points in the manual and identify the safest place to position the jack.
Step 2: Choose modular containers (pouches beat loose tools)
Instead of tossing tools in the spare well, group by function. A practical setup uses two or three pouches/boxes:
- ?Wheel hardware? pouch: wheel lock key, breaker bar socket, small wire brush, nitrile gloves.
- ?Inflate & repair? pouch: plug kit, compressor accessories, valve cores/caps, soapy water mini-spray.
- ?Safety? pouch: headlamp, reflective triangle, small first-aid add-on, rain poncho.
Step 3: Prevent rattles and protect trim
- Wrap metal tools with thin EVA foam or use tool rolls to stop clanking.
- Add hook-and-loop (Velcro) strips to the bottom of pouches if your trunk carpet allows it.
- Use a rubberized liner in the spare well to prevent rust stains and to keep cases from sliding.
- Keep sealant (if you carry it) inside a sealed plastic bag?temperature swings can cause leaks over time.
Step 4: Secure everything for crash safety
Unsecured tools can become projectiles in a collision. Advanced organization is as much about tie-down strategy as it is about neatness.
- Use ratchet straps or cam buckle straps for the jack and breaker bar.
- Install cargo anchors if your trunk has pre-threaded points (many vehicles do).
- For SUVs, consider a MOLLE seat-back panel with dedicated pouches?use this only for lighter items (gloves, lights, plug kit), not heavy jacks.
Step 5: Add a ?quick-reference? card
This is a small upgrade that saves time. Print a laminated card and store it in the Tier 1 pouch:
- Jacking point diagram (simple sketch)
- Lug torque spec (from manual or reputable source)
- Wheel lock key location
- Roadside checklist (hazards, triangle distance, chock placement)
Customization Techniques That Make a Big Difference
Technique 1: Color-coding and labeling
Label pouches with large, readable tags. Color-coding helps when visibility is poor.
- Red: safety and lighting
- Blue: inflate/repair
- Black: wheel hardware
Use a label maker or embroidered patch labels for a cleaner look that matches an OEM-style interior.
Technique 2: Upgrade to a proper lug tool strategy
The factory lug wrench is often short, awkward, and hard on your hands. A better setup:
- Breaker bar (18?24 inch) with the correct socket for leverage
- Torque wrench to tighten properly after the wheel is mounted
- Thin-wall socket if you have tight wheel pockets
This combo is cleaner, safer, and less likely to strip hardware than forcing a tiny factory wrench.
Technique 3: Build a ?clean/dirty? separation system
Flat changes are grimy. Keep your interior clean by splitting items:
- Clean pouch: headlamp, gloves (unused), torque wrench, reference card
- Dirty bag: used gloves, dirty rag, wheel chocks, breaker bar after use
A simple zippered wet/dry bag works well and prevents brake dust or road grime from staining trunk carpet.
Technique 4: Space optimization for small trunks
- Use a tool roll instead of hard cases for irregular spaces around the spare.
- Choose a flat compressor that fits underfloor.
- Replace bulky packaging with low-profile pouches and keep only the accessories you actually use.
Product Recommendations and Smart Comparisons
Rather than chasing a single ?best? product, build a system that fits your vehicle and budget. Here are useful categories with what to look for.
Tool storage: soft pouches vs. hard cases
- Soft pouches (best for most owners): flexible fit, less rattle, lighter. Look for heavy-duty zippers and internal pockets.
- Hard cases: excellent protection and stackability, but can waste space and rattle unless padded.
Portable air compressors: compact vs. heavy-duty
- Compact 12V compressors: great for topping off and emergency inflation; prioritize an accurate gauge and long enough power cord to reach all tires.
- Higher-output compressors: faster inflation and better for larger tires (trucks/SUVs); often larger and may require direct-to-battery clamps.
Jack upgrades: scissor jack vs. bottle jack vs. floor jack (portable)
- Factory scissor jack: space-efficient; slower and less stable on uneven surfaces.
- Bottle jack: strong and compact, but ensure it fits your vehicle?s lift points and has adequate minimum/maximum height.
- Portable aluminum floor jack: quickest and most stable, but typically too large for daily carry in smaller vehicles.
Organization hardware worth buying
- Non-slip cargo liner for the trunk or spare well
- Velcro-backed straps for securing tool rolls to carpeted panels
- Cargo net for Tier 1 quick-access items
- MOLLE panel + pouches for SUVs and overlanding builds
Common Mistakes to Avoid
- Burying the wheel lock key under luggage or leaving it in the glove box ?somewhere.? Keep it in the tire kit, labeled.
- Never checking spare pressure. A perfectly organized kit won?t help if the spare is flat.
- Relying on sealant only without understanding limitations. Many punctures (and sidewall damage) can?t be sealed safely.
- Using the wrong socket or a loose-fitting tool that rounds lug nuts.
- Not securing heavy items. A jack sliding around can damage trim?and it?s a safety hazard.
- Skipping a practice run. The first time you assemble the jack shouldn?t be on the shoulder at night.
FAQ: Advanced Tire Kit Organization
How often should I inspect my tire kit?
Every 3?6 months is a solid routine, or at each oil change. Check spare pressure, confirm the wheel lock key is present, test the compressor power-up, and make sure straps and pouches are intact.
Should I keep my tire kit in the trunk or inside the cabin?
Heavy items (jack, breaker bar) belong low and secured?usually the trunk/spare well. Light, quick-access items (headlamp, gloves) can go in an underfloor bin or a side cubby. Avoid placing heavy tools loose inside the cabin.
Is a tire plug kit safe to carry and use?
For many tread punctures (like a nail in the main tread area), a plug kit can be an effective temporary repair. Avoid plugging sidewall damage, large tears, or anything close to the tire shoulder?those situations typically require a professional repair or replacement.
What?s the best way to stop tools from rattling?
Use a tool roll or foam wrap for metal-on-metal contact, and secure the bundle with straps. Soft pouches plus a rubberized trunk liner usually eliminate most noise.
Do I really need a torque wrench for a spare tire change?
If you want an OEM-correct setup, yes. It helps prevent overtightening (which can warp brake components or damage studs) and undertightening (which can be dangerous). Many owners keep a compact torque wrench in the tire kit and use it after the wheel is on the ground.
My car came with a tire mobility kit (no spare). How do I organize that?
Keep the sealant and compressor together in a leak-proof bag, store gloves and a rag with it, and add a plug kit only if you?re comfortable using it and your tire type allows it. Most importantly, keep the kit accessible?mobility kits are useless if they?re buried under cargo.
Actionable Next Steps: Set Up Your Tire Kit Like a Pro
- Do a full inventory today: confirm lug size, spare pressure, and wheel lock key location.
- Create a 2?3 pouch system (wheel hardware, inflate/repair, safety) and label each one.
- Secure the heavy items using straps and anchor points so nothing shifts.
- Add a quick-reference card with torque specs and jacking points.
- Practice once at home: loosen a lug nut, locate the jacking point, and verify your tools actually fit.
A well-organized tire kit doesn?t just look tidy?it saves minutes when they matter, protects your interior from grime and damage, and makes you more self-sufficient on the road. For more practical car interior organization guides and smart storage upgrades, explore the latest articles on carinteriormix.com.